The Manage Project dialog lets you manage autocomplete summaries and Details Snippets, as well as entry templates.
Here you can also set passwords to enter when opening or editing a project.
All settings here apply only to their project and you can export most content to other projects or import from other project.
Autocomplete Summaries and Details Snippets
In the Autocomplete tab you an add, edit and remove saved summaries that can be suggested by Keeping Time when you create a new entry.
You can also do the same for pre-saved snippets which you can input into a details section of an entry.
Summaries
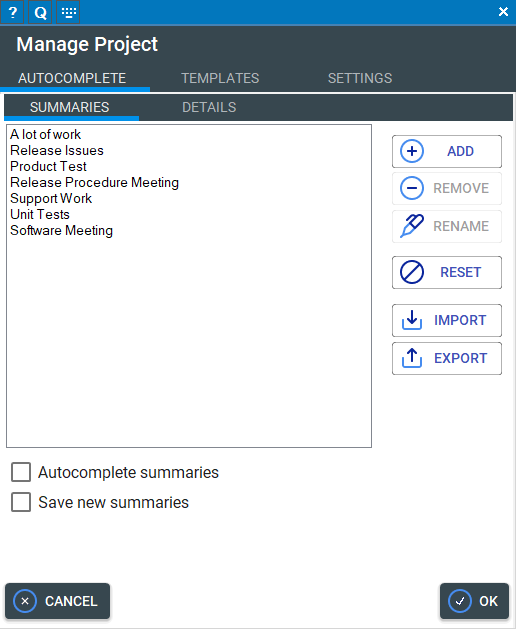
Saved Summaries Area
In this area you will find all saved summaries.
Add
Click add to add a new summary.
Remove
This removes the selected summary.
Rename
Click to change the selected summary.
Reset
This resets the whole list, deleting all entries.
Import
Click to import a saved summaries file.
Export
Click to export all summaries to a standalone file.
Autocomplete summaries
If checked, the Summaries textbox when making a new entry or editing an existing one will autocomplete with previously saved summaries.
Save new summaries
If checked, when making a new entry, its summary will be added to the pool of autocomplete values if it does not already exist. You can manage saved summaries in Manage Project/Autocomplete.
Details
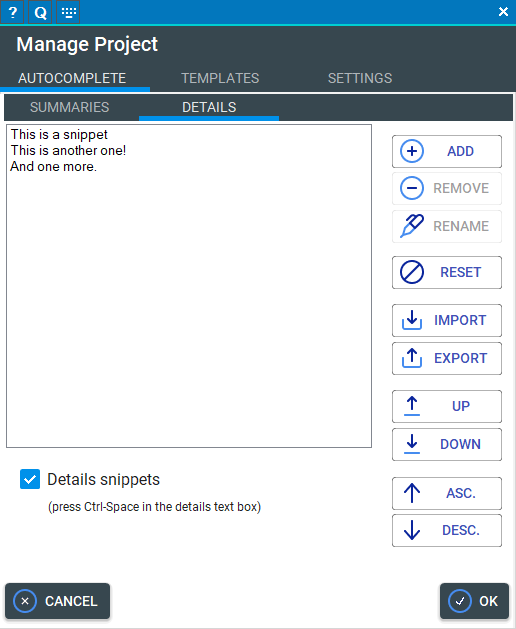
Saved Details Snippets Area
In this area you will find all saved snippets.
Add
Click add to add a new snippet.
Remove
This removes the selected snippet.
Rename
Click to change the selected snippet.
Reset
This resets the whole list, deleting all entries.
Import
Click to import a saved snippets file.
Export
Click to export all snippets to a standalone file.
Up
Moves the selected snippet up in the list.
Down
Moves the selected snippet down in the list.
Ascending
Sorts the snippets list ascending.
Descending
Sorts the snippets list descending.
Details snippets
If checked, pressing Ctrl-Space when in a Details textbox during entering or editing an entry, will call up a popover with saved Details Snippets.
Entry Templates
If you use very similar entries over and over again (like for example overtime directly after your regular work time ends), you can save entries as templates. These save all fields but the date and can be populated into a new entry with a single click.
The Templates area lets you manage these templates for timelists and unitlists.
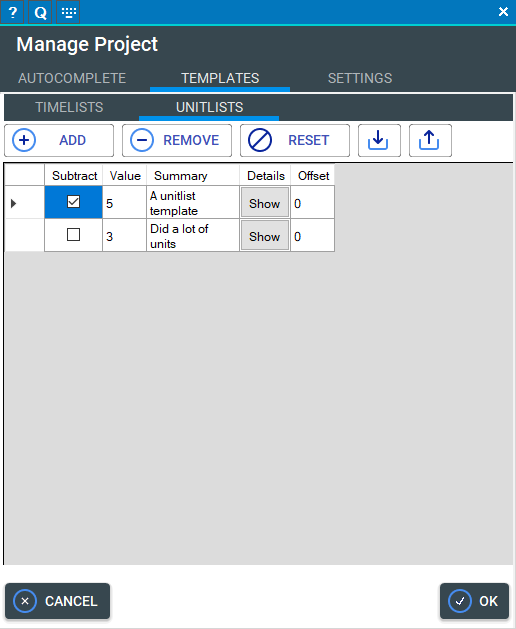
Saved Templates Area (in the middle)
Here you see all saved templates. The arrow in front of the row shows the active row.
Click Details to show (and edit) that entry's Details field. Double click any field to change its value. Changes will be saved when clicking OK.
Add
Click Add to add a new template with pre-populated values. Just double-click any value to change it.
Remove
Removes the selected template.
Reset
Resets the list, deleting all templates.
Import
Imports template from a saved file - make sure to select a template file for the correct list type!
Export
Exports all templates for the current list type into a standalone file.
Settings
In the settings tab, you can set the project to save its window size and position internally, as well as protect opening and editing the project with a password.
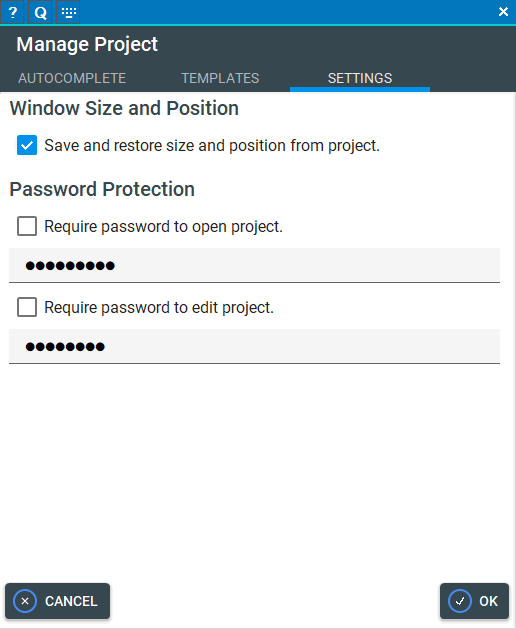
Save and Restore Size and Positon
If checked, the size and position of all windows of this project will be saved inside the project and recalled from it.
If unchecked, size and position will be recalled globally for all projects from the application settings.
Use this preference if you routinely work with multiple projects which you want to always see at their respective unique screen position. Note that if you open projects on a different system, their windows might be out of bounds. Holding Shift while opening a project will ignore the saved values and use the defaults.
Password Protection
While Keeping Time deliberately uses a completely open file format, sometimes it is good to be able to protect your project.
You can opt here to require a password to open the project. If enabled, the password must be entered when attempting to open the project. The project content will not be visible until the password is entered correctly.
Requiring a password to edit the project will allow it to load (unless the former option is enabled, too), but it will be write-protected. Making any changes requires entering the password.
Note that these are just basic measures to prevent immediate access. Project are (and will be) fully open, so this will not prevent people from loading the project in a text editor!