The Add Time dialog is where you make new entries into a timelist.
You can get to this dialog two ways:
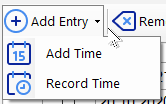
1) Calling it up directly via Add Antry - Add Time
2) Recording the time via Add Entry - Record Time.
Add Time
To add a new entry to the list, click Add Entry - Add Time.
The Add Time dialog will open, where you can enter a date (the current date is pre-selected), a "From" and "To" time, as well as specify whether the time will be a negative time, plus information about the entry.
Important:
There are two different UI elements you can use to enter times. You can either use a text box, which lets you enter times like "945" for "09:45" and works in 24 hour format; or a time picker, which will conform to your system settings.
Please see the General tab in the Settings for details. Make sure to pick the right method for your workflow! The choice is very important for speed and ease of entering.
Quick Timer:
If you have recorded a time via the Quick Timer (see Timer), this time will be filled in automatically when opening this dialog!
This feature is fully automatic, you do not need to do anything.

Date
Enter the date here, the default is the current date.
From
Enter the start of your working time here. This field is affected by your choice of Time Picker (see General).
To
Enter the end of your working time here. This field is affected by your choice of Time Picker (see General).
Offset
Enter an offset that will be added to or subtracted from the calculated time. The +/- sign in front changes whether the value will be subtracted or added.
Time Off
If checked, the time difference between your From and To time will be taken as negative time, to be subtracted from the other times in your list.
If unchecked, it will be added.
Add to templates
If checked, the entry will be added to the entry templates.
Summary
Enter a short summary that describes this entry. If you have enabled summary autocompletion (see Manage Project/Autocomplete), previously saved summaries will be suggested.
Details
Here you can enter any details you like about the entry. If you have enabled Details Snippets, pressing Ctrl-Space will open a list of available snippets to enter.
Add more
If checked, clicking Add to List will not close the dialog, but reset all fields and allow you to add another entry.
Work Vault
This button opens the Work Vault window. If it is already open, it will be brought into the foreground and you will be asked if you want to switch the Work Vault window to input directly into this Add Time window.
Once the window is open, you can transfer times from the Work Vault into this window. Once an entry is added to the list, it will be removed from the Work Vault automatically.
Templates
Click the Templates tab to see a list of your previously saved entry templates.
Double-click any entry to put its values directly into the Add Entry tab! This is a super quick way of making it easy to enter often-used entries.
Record Time
If you're just starting a period of work, you can have Keeping Time look on the clock for you.
Choose Add Entry - Record Time and the Timer will open. If you hold Shift while clicking Record Time, the timer will start automatically.

Start/Stop
Press the Start button and the timer will start. Click Pause to stop the timer, or click Commit to close the timer.
Enter the Summary for the time in the text field in the middle. You can leave this empty and add it later!
You can click the Expand button to enter information for the Details field. Again, you can leave this empty.
Note that in this mode, when the Timer is connected to the Timelist, additional features as described in Timer are not available.
Add Time
Once you're done working, click Stop and the Add Time button on the far right (or click Add Time directly). This will open an Add Time dialog (see above), with the From and To times already filled out for you.