The List Window is where you'll most likely spend most of your time in Keeping Time, because this is where you... pun intended... are Keeping Time.
There is one List Window for every list type (currently timelists and unitlists) and each window holds all lists of its type. Here you make work entries, edit them, export them, etc.
List Area
The very center of the window holds the actual list.
This table will show the content of the currently selected list and is basically a spreadsheet. This is on purpose; Keeping Time's philosophy is to be a really smart version of the spreadsheet you might have used before, so it deliberately does not show the data in some fancy way. Just a plain and easy to use list.
Click once on any row to select it - options like Remove and Edit will always apply to the selected entry. The selected row is shown with an arrow in front of it.
Double click any field to edit it, but it generally is better to just click the Edit button after selecting the row.
Toolbar
In the toolbar you will find all important commands for managing your list.

Add Entry
This button expands to either let you Add Time Entry or Add Unit Entry, depending on the list type. You can directly add an entry, or start a timer that will call up an entry dialog when you're done with work.
Remove
Removes the selected entry.
Duplicate
Duplicates the currently selected entry. You can then edit it and change whatever properties you need to change.
Edit
Edits the selected entry - the dialog is the same as with Add Entry/Add Time, so everything about creating new entries also applies when editing existing ones.
Tools
In the Tools menu you can copy the current entry to the clipboard, export the current list or all lists in the project to CSV files, and call up various windows.
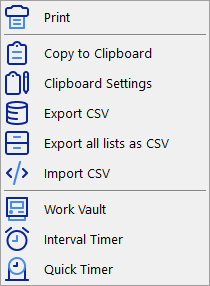
Creates a printable copy of the current list and shows the Print dialog.
Copy To Clipboard
Copies the current entry properties to the clipboard (also usable via Ctrl-C). You can then paste it as text wherever you want.
This is useful if you want to add a particular time to an email or so. Note that you can NOT transfer times to another list that way (yet).
Clipboard Settings
Opens the Clipboard Settings dialog to set the export patterns when using Copy to Clipboard.
Export CSV
Exports the current list as a CSV file which can be opened with any application that reads CSV.
Export all lists as CSV
Exports all lists of this list type as individual CSV files which can be opened with any application that reads CSV.
Import CSV
Opens the CSV Import dialog, where you can import CSV data into the current list or the Work Vault.
Work Vault
Opens the Work Vault.
Interval Timer
Opens the Interval Timer.
Quick Timer
Opens the Quick Timer.
On Top
If checked, the list window will stay on top of all other windows on the system.
Total Hours/Units
If there are entries in the list, this area will show the total sum of time/units in the current list. If an offset is set in the Properties (see below), it is taken into account.
You can use this display to for example get a view of your "open" overtime/open units, as negative times/values are subtracted from the positive ones here.
Statistics
Click this button to open the List Statistics window for the current list.
Properties
This button toggles the list properties panel (see below).
Some buttons are only visible if the Project Window is hidden:
Project
This button will show the Project Window again.
Close
This button closes the project, along with any open List Windows.
Save
This button saves the project.
Properties Pane
The Properties panel lets you set information about this specific list, as well as switch between all lists in the project and manage your lists, add new ones, set the list defaults etc.
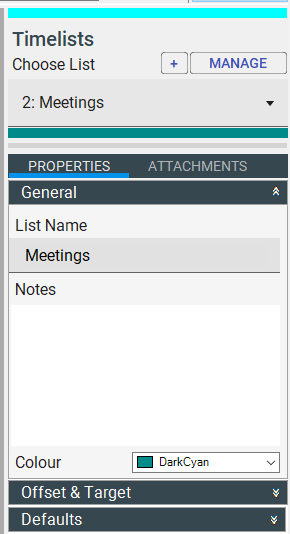
Choose List
This dropdown menu shows all lists of the respective type in your project. Select the list you want to see and it will be displayed in List Area and its properties populated.
Manage Lists/Add new List
The Manage (Lists) button will open the Manage Lists dialog. If you hold Shift when clicking this button, the Manage Project/Autocomplete dialog will open.
The + icon directly lets you add a new list. The newly created list will be shown directly.
List Colour Strip
This small strip shows the selected list colour. You can use it to tell lists apart easily with different colours.
List Properties Tab
The properties tab is grouped into multiple sections, which you can collapse or expand individually. By default General properties are shown.
General
List Name
You can give that particular list a name here. This will be shown in the title bar after saving, too.
List Notes
You can enter some notes for this particular list here.
List Colour
Here you can choose colour this list will be associated with. The colour is shown below the list name, in the toolbar (if the properties are collapsed), etc.
Offset & Target
List Offset
In timelists, here you set a time offset for the current list in hhh:mm. In unitlists, you can specify a numerical offset here (including negative and decimal values).
Whatever you enter here will be added to (or subtracted from) your list total. In Timelists, there is a "Negate" checkbox, which will subtract the entered value from the list; in unitlists, simply type a negative value.
Use this for example to track pre-billed support incidents or anything similar, where you want to apply an offset to the values in your list, or for vacation days where the time you enter will be subtracted from a "time balance".


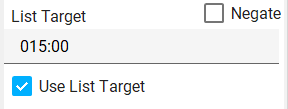
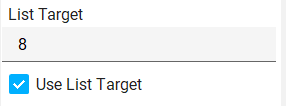
List Target
In timelists, here you set a time target for the list to meet in hhh:mm. In unitlists, you can specify a numerical target here (including negative and decimal values).
Whatever you enter here will be taken as the target for the list total to meet and the Total hours/units field in the toolbar will show how far you are off from the target in parentheses. In Timelists, there is a "Negate" checkbox, which will subtract the entered value from the list; in unitlists, simply type a negative value.
Use this if you want your list to meet a specific target to see how much you are still off.
Defaults
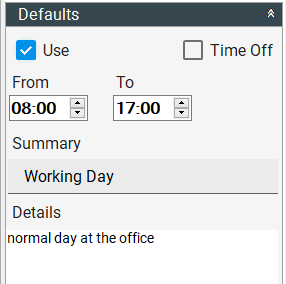
Use
Check to pre-fill the values entered here when creating a new entry.
You can of course change everything before actually making the entry.
Time Off/Subtract
Check if the entered time/value should be taken as negative.
From/To (timelists only)
The default "from" and "to" time, used to calculate the time span.
Value (unitlists only)
The default value of the entry.
Summary
The summary field of the entry.
Details
The details field of the entry.
Columns Tab
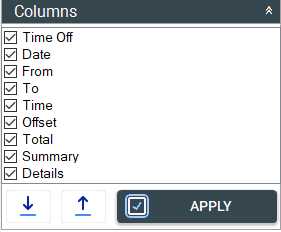
In the columns tab you can set which columns should be displayed in the list area, as well as their order.
Check a column to make it visible and use the arrow buttons to set the order, the click Apply. Column visibility is saved per list, so you can have different settings for different lists.
List Attachments Tab
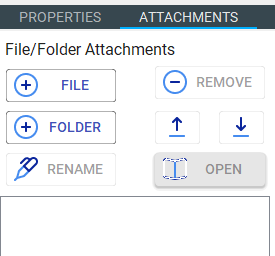
In the Attachments tab, you can link files and folders to the list.
These attachments are not physically copied to the project, but remain at wherever you add them from.
File/Folder
These buttons add files/folders to the attachments.
Rename
Rename the selected attachment. Note that this does not rename the file itself, just how it is referred to within Keeping Time. That's useful if you have auto-generated files with non-descriptive file names.
Remove
Removes the selected attachment(s) from the list.
Up/Down
Moves the selected attachment up or down.
Open
Opens the selected attachment(s) in their default application.
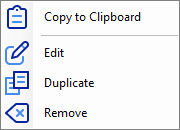
Context Menu
Right-click on any entry to open the context menu.
The items here correspond to the respective buttons in the toolbar.
